
Written by Bernie Carr
Do you wish you could take advantage of bountiful summer fruits and make them last a little longer? Making refrigerator jam is a great option you can try. But maybe you think you can’t possibly make jam in an apartment kitchen. Don’t worry – making refrigerator jam in a small apartment kitchen is not only possible but super easy. I’ve done it and so can you.
Here’s a step-by-step guide tailored for compact kitchen spaces:
Why Make Refrigerator Jam?
Refrigerator jam, also known as quick jam or freezer jam, is a fantastic option for beginners and seasoned jam-makers alike. Unlike traditional canned jams, refrigerator jam skips the lengthy boiling and canning processes, preserving the natural freshness and flavors of the fruits you use. This method is not only quicker but also retains more of the fruits’ nutrients and vibrant colors.
Ingredients You’ll Need:
- Fresh Fruits: Choose your favorite seasonal fruits such as strawberries, raspberries, or peaches.
- Granulated Sugar: Helps in preserving the jam and enhancing sweetness.
- Lemon Juice: Adds acidity and helps with the jam’s texture.
- Pectin (optional): A natural thickening agent that can help achieve the desired consistency.
Equipment:
- Small to Medium Saucepan: Choose one that comfortably fits the quantity of fruit you’re using.
- Wooden Spoon or Spatula: For stirring and mashing the fruit.
- Measuring Cups and Spoons: Essential for accurate measurements.
- Clean Jars or Containers: Ensure they are sterilized and have tight-fitting lids for storage.
Step-by-Step Guide:
Step 1: Prepare Your Workspace
- Clear a small area of your kitchen counter for prepping and cooking. Keep your ingredients and equipment within easy reach to maximize your space.
Step 2: Prepare the Fruit
- Wash and dry your fruits thoroughly. Remove any stems, pits, or cores, and chop them into small, uniform pieces.
Step 3: Cook the Jam
- In your saucepan, combine the chopped fruits with sugar (use about 1 cup of sugar per 2 cups of fruit) and a splash of lemon juice. Stir gently over medium heat until the sugar dissolves and the mixture begins to simmer.
Step 4: Simmer and Stir
- Lower the heat. Allow the fruit mixture to simmer gently, stirring occasionally with your wooden spoon or spatula. Use the back of the spoon to mash the fruit to your desired consistency. Make sure you keep an eye on your jam – it can burn very easily if you leave the heat too high, and you walk away.
Step 5: Test for Setting
- After about 15-20 minutes of simmering, perform a setting test. Place a small amount of the jam on a chilled plate or spoon. Let it cool for a minute, then push the edge with your finger. If it wrinkles and holds its shape, it’s ready. If not, continue simmering and testing every few minutes until desired thickness is achieved. I find that 30 minutes is usually when it sets for me.
Step 6: Cool and Store
- Once the jam reaches the desired consistency, remove it from heat and let it cool slightly. Transfer the jam into clean, sterilized jars or containers. Allow it to cool completely at room temperature before sealing with lids and storing in the refrigerator.
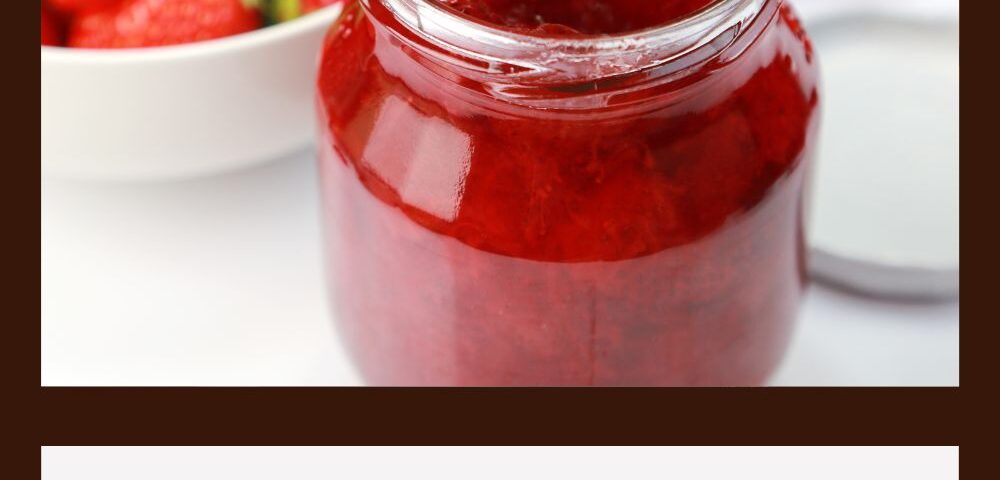
Sample Recipe 1: Strawberry Refrigerator Jam
Ingredients:
- 2 cups fresh strawberries, hulled and chopped
- 1 cup granulated sugar
- 2 tablespoons fresh lemon juice
Instructions:
- In a medium saucepan, combine the chopped strawberries, sugar, and lemon juice.
- Place the saucepan over medium heat and stir gently until the sugar dissolves.
- Bring the mixture to a simmer, then reduce the heat to medium-low.
- Simmer the mixture for about 15-20 minutes, stirring occasionally and using a spoon to mash the strawberries to your desired consistency.
- To test if the jam is ready, place a small amount on a chilled plate. Let it cool for a minute, then push the edge with your finger. If it wrinkles and holds its shape, it’s done. If not, continue simmering and testing every few minutes.
- Once the jam reaches the desired consistency, remove the saucepan from heat and let it cool slightly.
- Transfer the jam into clean, sterilized jars or containers. Allow it to cool completely at room temperature before sealing with lids.
- Store the jam in the refrigerator. It will keep for about 2-3 weeks.
Sample Recipe 2: Mixed Berry Refrigerator Jam
Ingredients:
- 1 cup strawberries, hulled and chopped
- 1 cup raspberries
- 1 cup blueberries
- 1 1/2 cups granulated sugar
- 2 tablespoons fresh lemon juice
Instructions:
- In a medium saucepan, combine the strawberries, raspberries, blueberries, sugar, and lemon juice.
- Stir the mixture gently over medium heat until the sugar begins to dissolve.
- Bring the mixture to a simmer, then reduce the heat to medium-low.
- Simmer the mixture for about 20-25 minutes, stirring occasionally and using a spoon to break up the larger berries.
- Test the jam’s readiness by placing a small amount on a chilled plate. Let it cool for a minute, then check if it wrinkles and holds its shape.
- Once the jam has reached the desired consistency, remove the saucepan from heat and let it cool slightly.
- Transfer the jam into clean, sterilized jars or containers. Allow it to cool completely at room temperature before sealing with lids.
- Refrigerate the jam. It will stay fresh for approximately 2-3 weeks.
Tips for Making Refrigerator Jam:
- Choose Ripe Fruits: The quality of your jam depends on the freshness and ripeness of the fruits you use.
- Adjust Sugar: You can adjust the amount of sugar based on your preference and the sweetness of the fruits.
- Experiment with Flavors: Feel free to mix different types of fruits or add spices like cinnamon or ginger for unique flavors.
- Use Clean Containers: Ensure your jars or containers are thoroughly cleaned and sterilized to prolong the jam’s shelf life.
These simple recipes allow you to enjoy the fresh flavors of seasonal fruits in a homemade jam that’s easy to make and delightful to savor. Adjust the sweetness and textures to suit your preferences and enjoy spreading these delicious jams on toast, pancakes, or pairing them with cheese and crackers.
Tips for Small Kitchen Success:
- Optimize Counter Space: Clear unnecessary items and keep only what you need within reach.
- Use Multi-Functional Tools: Choose tools and utensils that serve multiple purposes to save space.
- Organize Ingredients Efficiently: Arrange ingredients in order of use to streamline the cooking process.
- Label and Date Jars: Make sure you label your jam with the name and date you prepared it. Proper labeling helps keep track of freshness and flavors.
- Shelf life: Use within a month. The family likes it so much it doesn’t last that long. 🙂
Enjoy Your Homemade Jam!
Refrigerator jam is versatile and can be enjoyed on toast, yogurt, or as a topping for desserts. Experiment with different fruit combinations and flavors to create personalized jams that suit your taste. Making jam in a small apartment kitchen is not just about space efficiency but also about enjoying the process of creating something delicious from scratch. Embrace the simplicity of homemade jam-making and savor the flavors of each season with every spoonful. Happy jamming!
We are an affiliate of Amazon.com, which means we received a small commission if you click through one of our Amazon links when you shop, at totally no cost to you. This helps keep the lights on at the blog. Thanks!
About the author
Bernie Carr is the founder of Apartment Prepper. She has written several books including the best-selling Prepper’s Pocket Guide, Jake and Miller’s Big Adventure, The Penny-Pinching Prepper and How to Prepare for Most Emergencies on a $50 a Month Budget. Bernie’s latest e-book, FRUGAL DIY has just been released on Amazon. Her work appears in sites such as the Allstate Blog and Clark.com, as well as print magazines such as Backwoods Survival Guide and Prepper Survival Guide. She has been featured in national publications such as Fox Business and Popular Mechanics. Learn more about Bernie here.
FB: https://www.facebook.com/apartmentprepper
Instagram: https://www.instagram.com/apartmentpreppers/
Twitter: https://twitter.com/AptPrepper
YouTube: https://www.youtube.com/channel/UC7vOtdbo-wiBeBxD6puCr1Q
Patreon: https://patreon.com/apartmentprepper
Pinterest: https://www.pinterest.com/aptprepper/
Today’s societal climate not supportive of prepping. With your help, we can keep bringing you content that is often suppressed. Help keep Apartment Prepper alive.
Join me on Patreon for ad-free content.

Or Help out via Paypal

One comment