This post is by Bernie Carr, apartmentprepper.com
We all have our preferred morning beverage; for me, the daily cup of coffee is a must. A coffee drinker who is missing his or her daily coffee knows a caffeine withdrawal headache is coming. That’s why I made sure I include coffee in my emergency supplies. A few options for storage:
- Instant coffee – the “just add a heaping teaspoon to hot water” kind that comes in a jar (not my preferred choice)
- Individual packets of Starbucks or a similar brand (Not bad, even after it expired)
- Single cup bags of coffee – also just needs hot water (this is good too)
- tea
- Brew coffee beans without electricity
I know I may have to give it up at some point but I am not ready to do that yet.
How to Brew Coffee without Electricity
You will need:
–campfire popcorn popper (or small covered skillet)
–green coffee beans
–manual grinder
–French press
–measuring cup
–wire mesh colander (optional)
How to Roast Green Coffee Beans
- Since I am trying to have a backup plan in the event of an emergency and we are off-grid, I used our propane camp stove. Warning: I do not recommend using a camp stove in your kitchen: this would be unsafe and can cause carbon monoxide build-up. Camp stoves should be used outside. Also, I read from various articles that roasting green coffee beans may cause a lot of smoke. Our apartment has a very sensitive fire alarm which gets set off very quickly, so we did this outside, so the fire alarm does not go off. We don’t want a visit from the fire department from having the fire alarm go off while we are roasting our beans! If you are roasting on a stove indoors, turn on the exhaust fan or open a window to make sure your area is well-ventilated.
- Assemble all your materials in advance: green coffee beans (I used Kona coffee), campfire popcorn popper, measuring cup, wire mesh colander
- To start small, I measured about a quarter of cup of green coffee beans.
- Turn on the fire to low setting. Preheat the popper on low flame.
- Pour the green coffee beans into the skillet/popper, cover and shake.
- Keep the popper moving around and start listening for a popping sound.
- Check under the lid and look at the beans. They started to turn brown after about 5 to 7 minutes.
- The popping is not constant like popcorn, but happens every few seconds as the beans crack. This is about the time the beans start to smoke a bit.
- After about 10 minutes, I checked again and it looked like the beans were brown so I turned off the fire.
- You will notice some bits of chaff: pour into a wire colander or just blow on the beans and the bits fly off. Now you are ready to grind the beans.
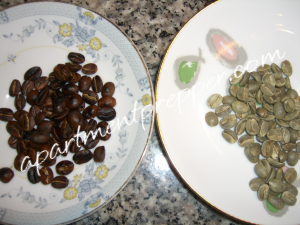
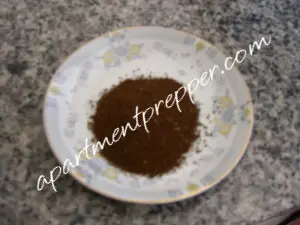
These photos show the difference between the green beans and the roasted beans. The smell is also quite different: the green beans do not smell like coffee at all, they have a pungent, plantlike smell, while the roasted ones indeed smell like the strong coffee smell we all know. The aroma does linger long after you have finished roasting them.
Grinding the Beans
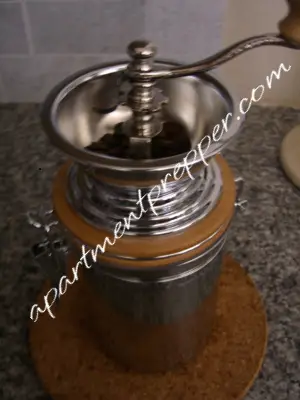
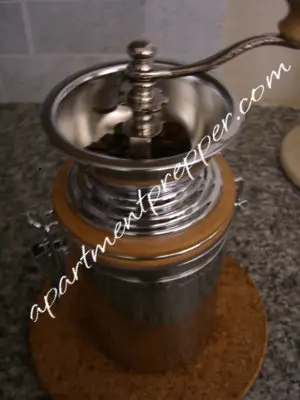
- I used the Danesco Manual Coffee Grinder. Adjust the grinder for maximum coarseness, if you will be using a french press. To do this, take off the handle and adjust the cog wheel up and tighten it back up.
- The grinder does not have any cushioning under the bottom, so you will need to stabilize it on the counter by placing a towel or pad underneath.
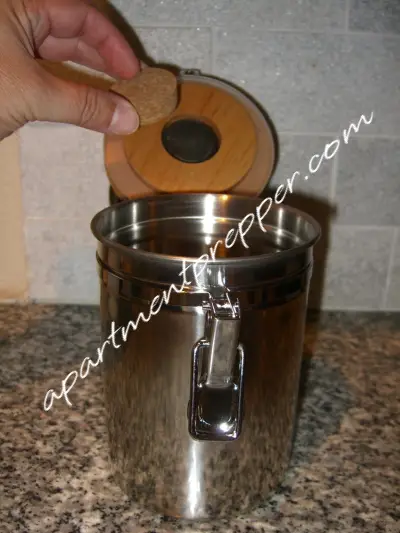
- Remove the cork stopper from under the grinding mechanism.
- Pour the beans and start grinding. Hold the grinder stable with the left hand and grind with your right hand (vice versa if you are left-handed).
I have to say this was the hardest part! It took a bit of muscle power to continuously grind the beans and hold it down. All in all, it took about seven minutes to grind the quarter cup of beans.
Brewing with the French Press
- I used the Bodum Shatterproof 8 cup French Press Coffeemaker. Eight cups sound like a lot of coffee, but actually, the “cup” is actually a 4-ounce cup, not an 8-ounce mug that most of us are used to.
- The quarter cup of whole beans made about 2 level scoops (measuring scoop came with the french press) of ground coffee. The rule of thumb is to use one scoop per cup of coffee.
- Boil water in a separate pan. I boiled about 2.5 cups of water. Turn off fire once the water boils. Because this is a plastic press, the instructions indicate the water must be hot but not boiling. I would think a glass french press would work with boiling water.
- Remove the cover/plunger of the french press.
- Pour the ground coffee into the bottom of the press.
- Pour the hot water.
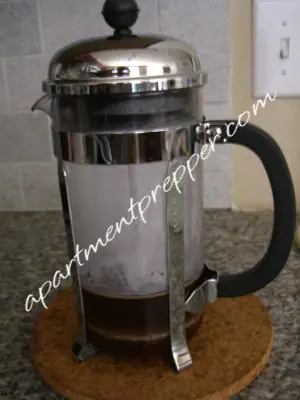
- Slowly insert the cover/plunger. Turn the lid so the opening/pour spout is sealed and away from you. and press the water/coffee gently until plunger cannot go any further. Do not apply too much pressure or this may cause the water to splatter up.
- Once the coffee is pressed, it is ready to drink!
I have to say this was a fine cup of coffee. It seemed like a lot of work for two cups, but it was worth it. The result was a very fresh tasting, strong cup of coffee. Roasting the green coffee beans was not hard at all; I can roast a larger batch next time.
In a disaster situation, you can’t beat a nice comforting cup of fresh brewed coffee.
Even if we never need to make coffee off grid, knowing how to roast green coffee beans saves money in the long run.
© Apartment Prepper 2013
For low-cost ways to prep:
For easy ways to become more prepared, read my book:


Is that really the cup you used?
For all that work?
It’s pretty cool that you roasted the beans yourself. I read that the unroasted beans last way longer than ground coffee. The best old coffee I’ve had was the kind packed in foil bricks. Cardboard cans are useless.Metal cans are hard to find.
Hi Jen, Since that was the first time I tried it I only made a small amount, but it was not just one cup. The cup was just for the photo, since that is the prettiest cup I own 🙂 but there was a more left over. The taste of fresh roasted beans was a huge treat and I highly recommend it.
if you want to make those foil packed bags of coffee last even longer…store them in your freezer…i keep 2 or 3 there all the time as my back ups ….
I figured. It is a pretty cup.
Why don’t you just get a manual percolator and you could make a whole pot of coffee on your campstove!
i have used my 10 cup alum. coffee pot ( from my camping gear) many times on the kitchen stove during power outages…its 25 yrs .old and works perfect….one of the best $8 investments i ever made…
Hi Kent, wow that aluminum coffee pot is great to still work well after 25 years.
I appreciate a good cup of coffee and you certainly sound like you do too. The more you do this the better you will get at it. Most people do not know how to make a proper and good cup of coffee. The shatterproof French Press was a nice touch for brewing.
Unless I misread the article I think your ratio needs improving. It should be one scoop of coarsely ground beans per 4 ounces of water. Steep for 4 to 5 minutes. This may be stronger than most people are used to drinking but is the proper way to use the French Press. You may get a little better flavor from the roasted beans if you let them rest a couple of days after roasting.
But hey, when the SHTF we will probably drink whatever kind of coffee we can. Your article made me smile and I hope you keep roasting and brewing. Thanks again.
You may be right – the ratio I used made a mild cup, I am sure yours would be stronger and more flavorful Thanks for the kind comments!
Loved the post, keep them coming. I keep staring at the green beans and roaster at the grocery store. I’m going to give it a try! I saw a recipe for bacon that I tried, but it’s very salty. Maybe you can find a better method.
Hey Jeff, Do it! Let me know how your green coffee roasting turns out. Great idea, trying to make bacon yourself. I am adding that to the self sufficiency project list. Thanks!