
This post is by Bernie Carr, apartmentprepper.com
Last week I told you about my food dehydrator adventure. This week I got to experiment with making soap at home. My son gave me a soap-making kit for Mother’s Day. Yes, my kids know what I like 🙂
The kit we tested was Chelsea’s Sage Basil and Mint Soap-making Kit.
What the kit includes
It has everything you need to get started with “melt and pour” soap-making:
- 2 1 lb. bars shea butter soap base
- basil, sage, and mint fragrance oil
- eucalyptus and spearmint fragrance oil
- basil essential oil
- eucalyptus essential oil
- 2 soap molds
- packet of crushed mint leaves
- 2 liquid soap color – yellow and green
- 4 vitamin E capsules
- pipettes for measuring oils
- instructions
We decided to use one half of the soap base for our first try. This way if we mess it up, we have another chance.
Other materials needed:
Container where you can melt the soap base – I used a large measuring cup
Thermometer – I only have a meat thermometer so I used that.
Microwave safe bowls
Wooden chopsticks for stirring – the instructions said wooden spoon but I substituted wooden chopsticks.
Soap-making Steps
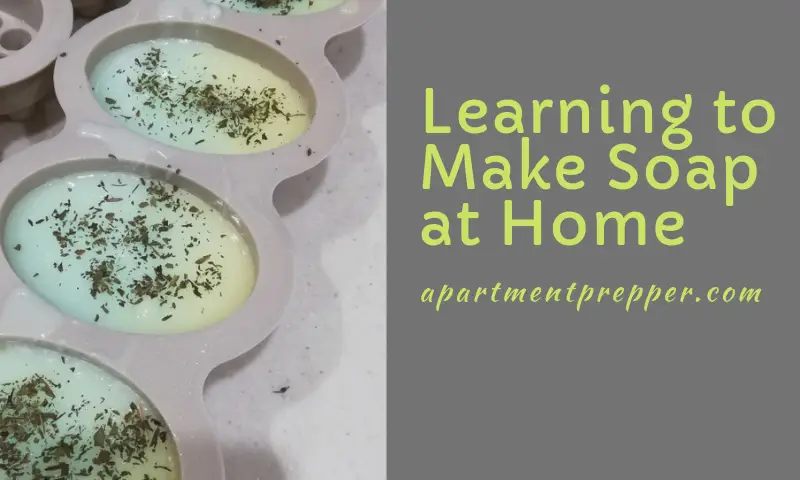
1. First, we cut the soap base bar into smaller chunks. We then separated them into two equal piles so we can use the two soap colors separately.
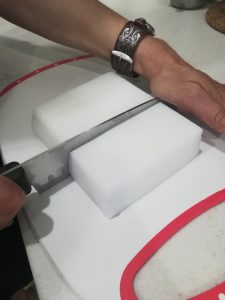
2. The instructions gave two methods for melting the soap base: double boiler or microwave. We opted for the microwave method: heat for 15 -20seconds at full power until melted. Soap base melts at 140 F, and the instructions indicated it should not exceed 160 F. It took about three 15 second tries in our microwave but your results may vary depending on your microwave.
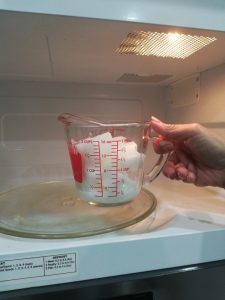
3. We then poured the melted soap base into a bowl, then mixed in a few drops of green coloring. The temperature stayed around 140 F.
4. The fun part is adding the fragrance. We used the basil, sage, and mint fragrance oil – about 15 drops, plus five drops of eucalyptus oil. The resulting mix had a clean scent which I really like.
5. I coated the soap molds with a bit of oil for easier handling.
6. We repeated the steps above. The second time around we used the yellow coloring, but the same fragrance and essential oil.
7. If the mixtures start to harden, just microwave for 10-15 seconds.
8. Once both colored mixtures are ready, it’s time to pour them into the mold.
9. The instructions indicated you sprinkle the dried mint either on the bottom of the mold or on top of the soap base. We tried sprinkling it after we already poured the mixture.
10. The soaps dried within three hours. We placed them in the fridge to make sure. The dried mint did not stick but the soap turned out fine. Next time we will add oatmeal and mint leaves into the mixture.
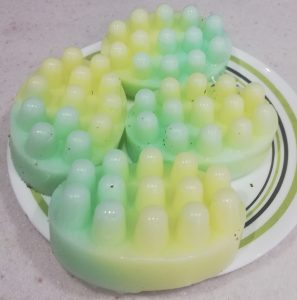
Result
I really like the smell of the soaps. They also clean very well. All in all, Chelsea’s Sage Basil and Mint Soap-making Kit was very easy and fun to use. I would definitely try making soaps again. Now that I know what to do, I will buy more soap molds and the ingredients individually and experiment with various mixtures. Here’s a quick video that shows the process. https://youtu.be/EqmviCcI53g
About the author:
Bernie Carr is the founder of Apartment Prepper. She has written several books including the best-selling Prepper’s Pocket Guide, Jake and Miller’s Big Adventure, The Penny-Pinching Prepper and How to Prepare for Most Emergencies on a $50 a Month Budget. Her work appears in sites such as the Allstate Blog and Clark.com, as well as print magazines such as Backwoods Survival Guide and Prepper Survival Guide. She has been featured in national publications such as Fox Business and Popular Mechanics. Learn more about Bernie here.

Soap is so fun to make. That kit looks awesome! I made it from scratch using lye and that can be intense. The soap base seems a lot easier to work with, but it was nice to know how to do it from lye itself. Looks great! Soap making is kind of addictive now, huh? 🙂 Thanks for the post!
Hi Morgan, You’re right, it’s addictive. Already have plans for the next batch, and added rectangular soap mold to my Amazon wish list. I can’t wait to try it again. Thanks for the comment.
I wonder how using “Ivory” soap as the base would work.
I hadn’t thought of that one Ben. It seems like it would work. Another experiment in the making! Thanks for the comment.
If you could find some “Ivory soap flakes” or just use a cheese greater to make soap flakes that might melt down easer than large chunks. Now be careful because there is an “Ivory” detergent flakes sold and this is not soap
Hi Oldguy, Thanks for pointing out Ivory detergent flakes is not the same as Ivory soap flakes.
Bernie, this is the first post I have seen with pictures showing how to make soap! I’m ordering a set today! Thanks for making it look easy!
Hi Linda! Glad you like that one. It’s super easy and a lot of fun. Thanks for stopping by!
Bernie – I have been learning and trying to perfect melt and pour soap making for about six months. It is easy to do but to get spectacular results with swirls and embeds, there is some technique involved.
Here are a few tips for you.
1. Do not oil your silicone molds. Instead, give them a good spritz with 91% rubbing alcohol.
2. After each pour, again spritz with your alcohol. This will remove air bubbles and will allow the layers to stick together. The same thing applies to toppings such as the herbs you added.
3. A good thermometer is useful. I use a laser thermometer but before I made that investment, I used an instant-read which is more reliable than a meat thermometer.
4. Do not begin your pour until your base is between 120 and 130 degrees F. This is especially important if you are using multiple colors since anything hotter will simply mix colors together and not keep them separate.
5. The fragrance is your most expensive ingredient. I use essential oils and they can get expensive. I do most of my “practicing” without fragrance so that I can remelt and start over if needed. The rule of thumb for using EOs is 1 tsp per lb. 1 tsp is an entire 5ml bottle.
6. You are better off buying the individual ingredients then getting a kit. The quality will be higher and the value greater for less money in the long run.
Finally, and this is general info, taking a commercial bar of soap and grating it then reforming it is called re-batching. It is not the same as melt and pour base and you will be disappointed with the result. Been there done that in my Backdoor Survival days. Also, most supermarket soaps have lots of chemicals in them and are nowhere near as natural as a pure goat’s milk, shea butter, or glycerine soap. Dr. Bronner’s and of course, custom crafted soaps are an exception.
Hahaha, I did not mean to write a novel here in comments and so for that, I apologize. I have been working on a tutorial for my website but as with all things during my retirement, I tend to procrastinate. I am, however, giving a class next Wednesday and I am thinking I will learn what questions newbies ask at that time.
In the meantime, have fun with your new hobby. It is addictive.!
Gaye
Hi Gaye, Thank you for these detailed and excellent tips! I’ll be following them for my next try.