

This post is by Bernie Carr, apartmentprepper.com
As many items continue to be scarce at the grocery store due to supply disruptions during the coronavirus pandemic, I’ve seen comments on social media wanting to know what to do if they run out of oil or fat for cooking.
One way to avoid this problem is to add fats and oils in your food storage.
Or, you can learn how to render lard or tallow. I’ve always been concerned about food waste, but even more so during these times. Learning how to render fat will also help you use up fatty pieces that might have gotten discarded. You’ll also save money as you can use lard in some recipes instead of store-bought oil. (If you are watching your cholesterol, you may have to limit consumption of lard – check with your doctor to be on the safe side.)
I had some pork in the freezer that had excess fat so I decided to save the fatty pieces and render lard.
What is rendering fat?
To render fat means taking fatty tissue, which normally might have been thrown away, and turning it into something you can use such as lard or tallow. If you render beef, you end up with tallow, which is a common ingredient for soap and candles. If you render pork, you get lard; chicken or duck skins turn into schmaltz. They can all be used for cooking.
Lard or Tallow: What’s the difference?
Lard comes from pork fat. It can be used for baking, such as making pie crust, or for cooking. Lard can also be used for dipping, such as using bacon grease or as a dressing ingredient. In addition, lard is used for commercial production of cosmetics and bio-fuel. It is considered a semi-solid fat.
Tallow is made from beef or mutton. Like lard, it can be used for frying. For commercial usage, tallow is commonly used for making candles, soap and bio-diesel. It is considered a solid fat.
Ways to render lard
For this article, I used pork fat, so we will focus on rendering lard.
Wet method
The wet method just means you add the fatty pieces to a pot with some water and start simmering until the fat separates from the solids. Strain out the solid pieces and allow the liquid to cool. You will see the fat floats to the top and you can skim it off.
Dry method
The dry method just means you don’t use any water to render the fat. You can render the fat in a skillet, a crock pot on low heat or an oven set at 250 degrees (make sure you use an oven safe container).
I personally tried the dry method in a cast iron skillet.
Here’s what I did
First, I chopped up the pork fat into small pieces.
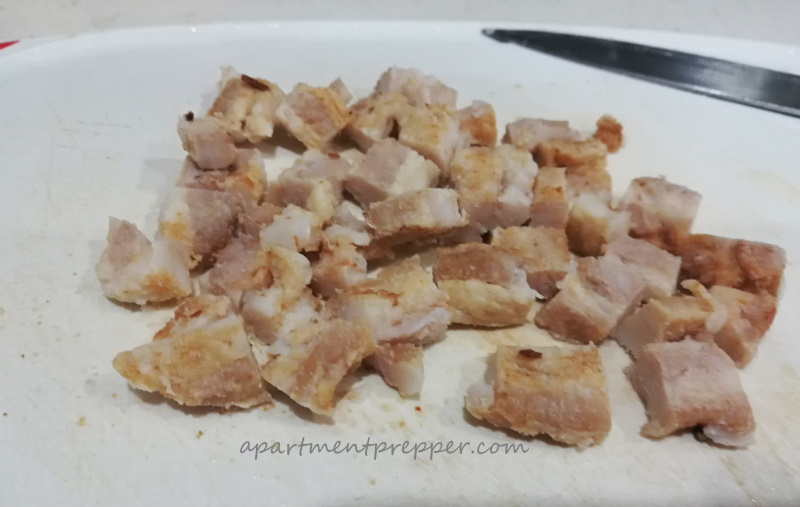
Then I placed the pork into a cool cast iron pan. I heated up the cast iron pan in medium heat. The pan started to heat up to fast and started to smoke I lowered the heat to low. You will need to cover the pan as it may get a little smoky in your kitchen. Slowly, the fat started to melt. After a while, the cracklings – the part that did not turn to fat – started to brown and I turned off the heat.

I then strained the solids out of the pan, and saved the cracklings. The cracklings can be used as a salad topping, as an ingredient in fried rice or noodles, or as a tasty snack. Add a bit of salt to the cracklings for extra flavor.
With the small amount of fat pieces I started with, I ended up with about half a cup of lard after the whole process.
I saved the lard for the next time I needed oil for stir frying.
If you try it yourself, here are some tips:
- It’s easier if you slice the fat into very small pieces.
- Do not leave the pan – keep watching as they can easily burn.
- If you want to try this process but do not have any fat pieces, you can use the same method with bacon. Save the bacon bits before they start to burn, you can use them in salads or baked potatoes later.
If you like DIY projects that help you become more self-sufficient, join me in Patreon:
Become a Patron!We are an affiliate of Amazon.com, which means we received a small commission if you click through one of our Amazon links when you shop, at totally no cost to you. This helps keep the lights on at the blog. Thanks!
About the author:
Bernie Carr is the founder of Apartment Prepper. She has written several books including the best-selling Prepper’s Pocket Guide, Jake and Miller’s Big Adventure, The Penny-Pinching Prepper and How to Prepare for Most Emergencies on a $50 a Month Budget. Her work appears in sites such as the Allstate Blog and Clark.com, as well as print magazines such as Backwoods Survival Guide and Prepper Survival Guide. She has been featured in national publications such as Fox Business and Popular Mechanics. Learn more about Bernie here.
We save and render bacon fat all the time! The curing salts adds flavor!
We use it for most all of our frying.
Especially pancakes and home fries!
Volunteer for the Church Breakfast, cook 10 pounds of bacon and keep the leftover fat!
There will be plenty, even after you use it for eggs, pancakes and home fries.
Stay Safe
Hi Rick, Thanks for sharing that- when you cook bacon for a crowd you will have lots of bacon fat left over! Good idea-thanks for the comment. Be safe.
Great idea! My mother used to make schmaltz ! But do you need to refrigerate the fat?
Hi Saul, Great question! For longer storage, you can refrigerate or even freeze the fat for up to a year. If you store it in the counter, make sure you strain out any solids so it is pure oil. Keep it in a covered container and it will last about a month. Thanks for bringing this up. I may have to write another article on this. 🙂